How to Avoid Last-Minute Cleaning Panics During Your Move-in

You’ve made it! After weeks of stress, hassle, and running back and forth like a headless chicken, you have finally unpacked the last box! You have finally moved in for good! And yet, in the back of your mind is this little voice that nags you: the place does not look as clean as you’d like. But you are so exhausted that you decide to neglect it – at least for now.

You can avoid this unpleasant feeling that spoils your move-in triumph with a well-planned and executed pre-cleaning of your new place. How do you do that? We are glad you asked—read on!
Understanding the Importance of Pre-move Cleaning

Understanding the Importance of Pre-move Cleaning

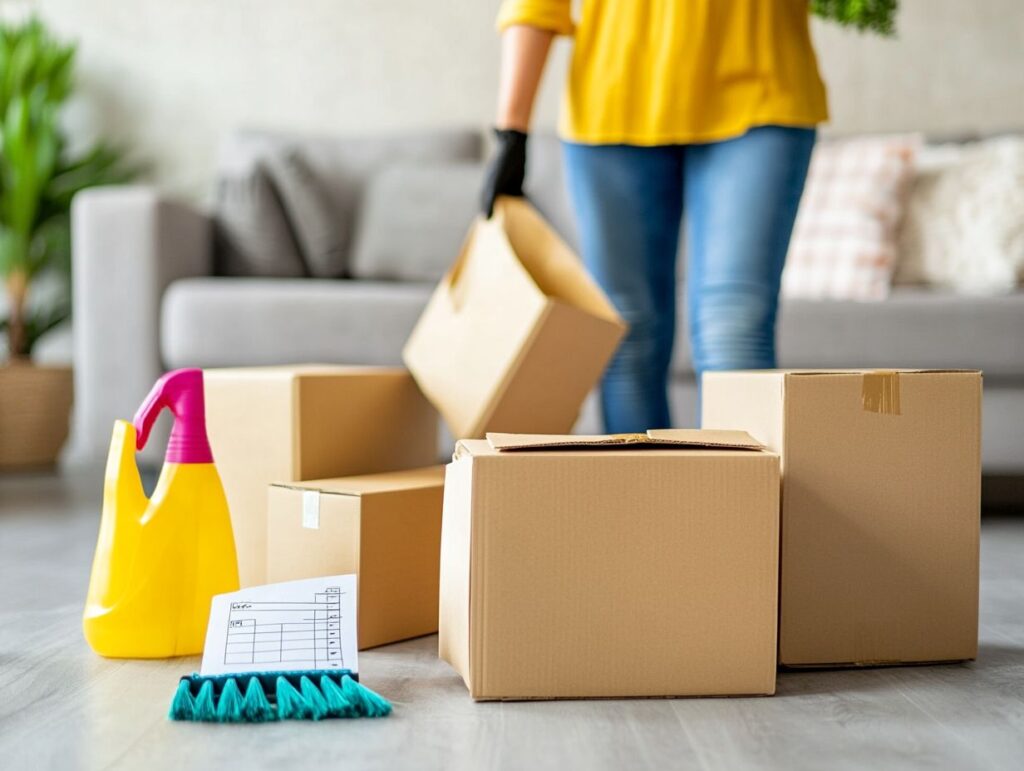
Pre-move cleaning isn’t just about sprucing up your home; it’s a game changer for easing the stress of relocating. A clean and organized space can make a difference, turning what could be a chaotic ordeal into something much more manageable.

By focusing on decluttering, you’ll reduce the number of items you need to transport to your new place, making the whole process far more efficient. Whether you own your home or rent, taking a systematic approach to cleaning can really set the stage for a smoother transition into your new abode.

Why Pre-move Cleaning is Essential

Understanding why pre-move cleaning is essential can boost your moving strategy and help you avoid that last-minute panic.

When you take the time to tidy up your space before packing, you make your environment more pleasant and simplify your organizational efforts. By tackling the clutter, you can quickly figure out what to keep, donate, or throw away. This little pre-move ritual lightens the physical load of moving and eases emotional stress, giving you a fresh start in your new place.

Incorporating tips like using clear storage boxes for the organization or creating a decluttering checklist can turn this task into something manageable—and perhaps even enjoyable! Ultimately, starting with a clean slate in your old home sets you up for a smoother transition into the new one.

Creating a Cleaning Checklist

Creating a cleaning checklist is a crucial part of your pre-move strategy. It helps you ensure that no detail is overlooked, whether packing up your belongings or decluttering your home.

Identifying Areas That Need Cleaning

Identifying the areas in your home that need cleaning is extremely important, especially since different rooms require different levels of attention—particularly when you’re in a hurry.

It helps to adopt a systematic approach to effectively ascertain what each room needs. Start by checking those high-traffic areas where dirt and grime seem to be having a party. For instance, your kitchen and living room might need some serious vacuuming and dusting, especially on surfaces that often get overlooked, such as skirting boards and ceiling fans.

Meanwhile, your bedrooms could benefit from a deep clean of carpets and bedding to keep those pesky allergens at bay. Concentrating on these detailed tasks will create a more inviting atmosphere and enhance your overall well-being in your living spaces.

Setting a Timeline for Cleaning Tasks

Setting a timeline for your cleaning tasks helps streamline your relocation process. It makes everything less overwhelming and more efficient as moving day approaches.

By breaking down your cleaning duties into manageable chunks, you can create a structured routine that reduces stress and ensures you tackle every essential task on time. Focus on areas that need immediate attention and allocate specific time slots for each task. This approach can lead to a smoother moving experience. Furthermore, having clear goals and deadlines keeps you focused and helps you avoid procrastination.

Ultimately, embracing this kind of organization gives you a great sense of achievement as you check off each task. It provides that much-needed relief when the pressure of a move starts to build.

Essential Tools and Products

Gathering Necessary Cleaning Supplies

Gathering the right cleaning supplies before diving into your pre-move cleaning saves you valuable time.

Furthermore, it ensures you’re ready to tackle the task.

Essential Tools and Products

Using the right cleaning products and tools can really enhance your efficiency and effectiveness when tackling dust and dirt on different surfaces.

Take microfibre cloths, for instance—they’re essential for dusting and wiping down your electronics without leaving scratches. And don’t underestimate the power of a quality all-purpose cleaner; it can work wonders on your kitchen and bathroom worktops. For those pesky grime spots, especially on tiles and grout, a floor scrubber paired with a specialized tile cleaner can deliver impressive results.

Let’s not forget about your glass surfaces! A streak-free glass cleaner and a squeegee will give you that brilliant shine you’re after. By equipping yourself with these specific products and tools, you’ll ensure every room in your home gets the attention it deserves, turning cleaning into something that’s easier and far more rewarding.

Tips for Efficient Cleaning

Using tips for efficient cleaning can make the overwhelming task of getting your home ready for a move much more manageable and less time-consuming.

Maximising Time and Effort

Maximizing your time and effort during the cleaning process comes down to effective organization and a focused strategy, especially with moving days around the corner.

With the clock ticking, prioritizing tasks is critical, tackling the high-impact areas first. By taking a systematic approach, you can seriously reduce the time you spend tidying up. Cleaning caddies filled with essential supplies can save you from constantly running back and forth to grab things, allowing you to complete each chore much faster.

Setting specific time slots for each task helps keep your momentum going, turning what could be a chaotic cleaning spree into a smooth operation. And don’t forget—enlisting friends or family can speed things up and make the whole experience much more enjoyable. You’ll turn those necessary chores into a fun opportunity to catch up and connect!

Dealing with Last-Minute Cleaning Emergencies

Dealing with last-minute cleaning emergencies can be one of the most stressful aspects of moving, but quick solutions can help relieve that pressure.

Quick Solutions for Unexpected Messes

When unexpected messes occur during a move, quick cleaning solutions can be your best friend, helping you regain control and keep everything on track.

Whether it’s those annoying dust bunnies on your hardwood floors or spills on the kitchen surfaces, having a toolkit of cleaning strategies ready is essential. For example, grabbing a microfiber cloth and a multi-purpose cleaner can help remove grime from almost any surface. And don’t underestimate the power of a simple vinegar and water mix—it’s a game-changer for glass and mirrors.

As you clean, sorting items into designated boxes can help minimize clutter and make your packing process smoother. Remember to pay attention to those often overlooked spots like skirting boards and corners with a damp cloth or vacuum attachment. This way, your new home will feel fresh and welcoming!

Final Touches and Post-Cleaning Maintenance

Adding those final touches and setting up a post-cleaning maintenance routine helps you enjoy a fresh start in your new home while keeping everything neat and organized.

Ensuring a Fresh Start in Your New Home

Establishing an effective cleaning routine can help you stay organized and relieve ongoing stress, allowing you to kick off a fresh start in your new home.

You can keep your space tidy and promote peace by weaving some simple yet impactful habits into your daily life. Start by tackling each room one at a time; dedicating just a few minutes a day to sort through items can prevent that overwhelming clutter from piling up.

Remember to schedule deep cleaning sessions each week to maintain a sanitary atmosphere. Labeled storage will also make everything easy to find. If you want to make cleaning feel less like a chore, consider playing soft music or trying guided meditation while tidying up.

It can transform mundane tasks into more mindful practices, making your post-move experience much calmer and more enjoyable.
Ensuring a Clean Property for New Tenants: A Landlord’s Checklist

You’ve shaken hands with your former tenants and said your goodbyes. No hard feelings – they were good people, and you had an excellent relationship, but life goes on. You don’t have time to spare – if you have already listed your attractive property for lease, you might have the first calls in days. So, let’s see how to expedite the preparation and present your property in the best light for its future occupants!

Overview of Landlord-Tenant Relationship

Overview of Landlord-Tenant Relationship

The landlord-tenant relationship is extremely important when renting. You must understand your rights and responsibilities to keep things running smoothly and maximise your rental experience.

Clear communication and adhering to your tenancy agreement are essential for creating a positive atmosphere. A successful relationship depends on mutual respect, understanding tenants’ expectations, and ensuring landlords fulfil their duties.

This way, you enhance tenant satisfaction and even the property value.

Preparing the Property for New Tenants

Preparing your property for new tenants involves a few key steps to create a clean and welcoming environment. This preparation builds trust with your tenants and includes a thorough move-in inspection to document the property’s condition and provide them with a checklist for cleaning tasks.

Managing expectations through clear property guidelines is crucial for maintaining hygiene standards and enhancing tenant satisfaction.

Deep Cleaning and Maintenance Tasks

Deep cleaning is crucial to keeping your rental property in top condition. It ensures that every nook and cranny is spotless and ready for new tenants. A thorough cleaning checklist helps you cover everything, from the inside to the outside, ensuring you use your cleaning supplies effectively. This kind of preparation sets the standard high for cleanliness, boosting tenant satisfaction and building trust.

Focusing on carpets, kitchen appliances, and bathrooms makes the place look great and contributes to a healthier living environment. And don’t forget about your outdoor spaces! Keeping patios and gardens tidy is crucial in creating an attractive, welcoming atmosphere. You might want to consider hiring professionals for deep cleaning tasks; they can tackle those hard-to-reach spots you might overlook.

This investment aligns perfectly with tenants’ expectations of their living spaces—pristine conditions that keep them happy and help you maintain lower turnover rates.

Ensuring Safety and Functionality

Ensuring your rental property is safe and functional is vital to keeping your tenants happy and fulfilling your landlord’s responsibilities.

Regular safety inspections are crucial for spotting hazards such as faulty plumbing, electrical issues, and other risks that could affect your tenants’ living environment. Furthermore, maintaining smoke alarms and carbon monoxide detectors in excellent condition helps create a safer atmosphere for everyone.

Checking for Potential Hazards and Repairs

Conducting checks for potential hazards and necessary repairs is vital to keeping your rental property safe and minimising tenant turnover. Regular maintenance inspections help you address issues quickly and create a property condition report that details any needed repairs or safety compliance measures. Adhering to safety standards can build tenant trust and promote a positive living experience.

This thorough documentation isn’t just for your benefit; it’s also a valuable reference for your tenants. It outlines the state of the property and any actions taken. When you systematically identify hazards—such as electrical problems, plumbing leaks, or structural weaknesses—you take a proactive approach that reduces risks and demonstrates your commitment to tenant safety.

By documenting repairs and improvements clearly, you can foster a transparent relationship with your tenants, making them feel secure. Keeping up with maintenance not only helps you retain tenants but also aligns with local regulations, ensuring compliance and creating a welcoming and safe residential environment.

Furnishing and Supplying the Property

Providing Necessary Amenities

Providing the right amenities is crucial for making your rental property more appealing and keeping your tenants happy. Think of amenities as the cherry on top—from practical features like secure premises and maintenance-free communal areas to aesthetic upgrades like fresh paint and tidied-up landscaping.

When you meet environmental and rental standards, you boost your property’s value and attract prospective tenants who are looking for a welcoming place to call home.

Furnishing and Supplying the Property

Furnishing and supplying your rental property can boost its appeal and functionality for new tenants. Selecting the right furniture and amenities can improve the aesthetics and comfort of the place, making it feel inviting.

During new tenant orientation, sharing details about the furnishings you have included helps set clear expectations and promotes satisfaction right from the start.

The right furnishings make the space look good and make tenants feel valued and comfortable in their new home. By considering essentials like quality bedding, functional kitchen items, and stylish decor, you create a memorable move-in experience.

Attention to these details can lead to long-lasting relationships and higher retention rates. People are more likely to settle into a modern and homely space. Enhancing your rental property with thoughtfully selected amenities can turn a simple house into a cherished home, fostering a sense of community and belonging.

Setting Expectations for Tenants

Setting clear expectations for tenants is crucial for building a smooth landlord-tenant relationship and ensuring everyone is on the same page with rental policies. By keeping the lines of communication open about your responsibilities as a landlord, property guidelines, and tenant rights, you and your tenants will better understand what is expected during the tenancy period.

This proactive approach helps minimise disputes and enhance overall tenant satisfaction.

Communicating Rules and Guidelines

Effective communication of rules and guidelines is crucial for building a transparent relationship between you and your landlord. When rental policies, tenant rights, and landlord duties are clearly outlined, it creates a predictable environment where you can feel secure and respected. Starting with this information during a new tenant induction can set a positive tone.

But it doesn’t stop there! Using clear signage around the property, distributing written materials, and maintaining an easily accessible online portal for policy updates can significantly impact your understanding. These methods keep you informed and ready to navigate your responsibilities, helping to foster a culture of trust. When you see the rules clearly explained and readily available, you’ll be more likely to adhere to them and feel given the power to raise any concerns.

Taking this proactive approach boosts compliance and helps create a supportive community where open dialogue is encouraged, creating a harmonious living environment for everyone involved.

Handling Move-In and Move-Out Processes

Effectively handling move-in and move-out processes is critical to keeping tenant turnover low and ensuring your property is in top-notch condition for new tenants.

When you carry out a thorough move-in inspection, you can document the property’s condition and help tenants understand what is expected of them. Likewise, having a structured move-out cleaning process means the place will be ready and welcoming for the next occupant.

Documenting Property Conditions and Deposits

Documenting the property’s condition and managing deposits are key steps in your move-in and move-out processes. This ensures clarity and protects the rights of both you and your landlord. A detailed property condition report can be a lifesaver during disputes, and aligning your deposit agreements with these documents builds trust and compliance. By keeping thorough documentation, you boost transparency and help reduce potential conflicts.

Creating a comprehensive property condition report means taking clear photographs, noting any existing damage, and documenting any quirks that might impact your tenancy. This careful approach not only sets clear expectations but also acts as a safeguard for you as a tenant, reinforcing your rights regarding the return of your deposit.

This documentation can be invaluable for mediating disputes regarding wear and tear versus intentional damage.

As a result, you and your landlord can feel secure, knowing there’s a solid record supporting fair assessments during those transition periods, ultimately fostering a harmonious rental relationship.

How to Deal with Hard Water Deposits and Limescale in Your Kitchen and Bathroom

Hard water deposits and limescale can be frustrating in kitchens and bathrooms, affecting everything from appliances to surfaces. Understanding these deposits and how they form is the first step toward tackling them.

This article explores the damaging effects of hard water, shares effective cleaning techniques to remove stubborn build-up, and provides tips on prevention through water-softening methods.

Get ready to reclaim the shine in your home!

Preventing Hard Water Deposits and Limescale

Understanding Hard Water Deposits and Limescale

Understanding hard water deposits and limescale is essential for keeping your home in excellent condition. These bothersome mineral build-ups can sneak in and cause trouble in your kitchen and bathroom.

Hard water has higher calcium and magnesium levels, leading to irritating limescale—a tough, chalky residue that loves to settle in plumbing fittings, appliances, and surfaces over time.

By recognising what causes these issues, you’ll be able to take preventive measures and use effective cleaning solutions, ultimately improving your water quality and extending the lifespan of your appliances.

What are They, and How Do They Form?

Hard water is water loaded with minerals, mainly calcium and magnesium. When this water is heated or evaporates, it can create limescale, which is not a welcome guest.

As water passes through soil and rock, it picks up minerals like calcium carbonate, turning into hard water. This mineral mix can significantly change the taste of your water and interfere with your household appliances and plumbing systems. When you heat hard water, such as in your kettle or dishwasher, that calcium carbonate starts to crystallise and form limescale. You might notice those chalky white deposits, which can clog your pipes and cause appliances to work less efficiently.

For example, you might find your showerhead sporting some unsightly, crusty formations that block the water flow and could lead to expensive repairs or replacements. That’s why it’s essential to understand and manage hard water in your daily life.

Effects of Hard Water Deposits and Limescale

The effects of hard water deposits and limescale go far beyond annoying stains; they can seriously impact appliances and plumbing systems, leading to hefty repair bills down the line.

As limescale builds up, it can make your water heaters, dishwashers, and washing machines less efficient, forcing them to work harder and shortening their lifespan.

Additionally, hard water can leave unsightly stains on taps, shower doors, and tiles, disrupting the appearance of your bathroom and kitchen.

Understanding these effects is crucial for keeping your household clean and your appliances running longer.

Damage to Appliances and Surfaces

Damage from hard water and limescale build-up can manifest in annoying ways, interfering with appliances and surfaces in your kitchen and bathroom.

For example, your water heater might not operate as efficiently, leading to higher energy bills because of that pesky limescale accumulating in the tank. This can eventually result in some rather costly repairs or even replacements. Dishwashers aren’t exempt either; their spray arms can get blocked, so your dishes might not come out as clean, leaving you with unsanitary crockery. Plus, tiles and glass surfaces can look cloudy and stained, which isn’t exactly the atmosphere you want for your home.

To tackle these issues, it’s a good idea to use cleaning solutions specifically made for hard water stains regularly. You might also want to consider applying surface treatments that create a barrier against mineral build-up, keeping your appliances and surfaces looking their best.

Removing Hard Water Deposits and Limescale

Removing hard water deposits and limescale may seem like a big chore, but it doesn’t have to be! With the right cleaning solutions and techniques, you can completely restore your surfaces and appliances to life.

You’ll be amazed at how well common household items like vinegar and bicarbonate of soda can work as eco-friendly cleaners, breaking down those stubborn mineral buildups. If you’re facing a particularly tough limescale problem, specialised descaling agents can be your best friend, ensuring everything in your kitchen and bathroom shines like new.

Effective Cleaning Techniques and Products

Selecting the right products is crucial for achieving sparkling results when it comes to effective cleaning techniques for hard water deposits.

Using a mix of cleaning products—from chemical solutions to eco-friendly alternatives—allows you to tailor your approach to your specific cleaning needs. For stubborn stains, vinegar or bicarbonate of soda is a fantastic choice and is also kind to the environment.

Don’t forget about the application techniques, either! Allowing the cleaning agents to sit on surfaces for a little while before wiping can help ensure all the residue is removed. Finishing up with polishing agents will leave things clean and gleaming, making these practices practical and a win for long-term maintenance.

Preventing Hard Water Deposits and Limescale

Preventing hard water deposits and limescale build-up is the best way to keep your appliances and plumbing systems running smoothly for a long time. Investing in water softeners or efficient filtration systems can reduce the mineral content in your water supply, which helps reduce the risk of limescale accumulation.

If you adopt effective prevention strategies and maintain your plumbing regularly, your kitchen and bathroom will look fresh and be free from pesky hard water stains and mineral build-up.

Water Softening Methods and Tips

Water softening methods are key to tackling hard water issues, and you have various options to suit your household’s needs.

You have plenty of choices, from traditional ion-exchange systems that replace troublesome hard minerals with sodium ions to salt-free alternatives that use a templating process to reduce scale buildup. If you prefer eco-friendly solutions, some options use natural materials to soften water without any chemicals or salts, which is excellent if you want to maintain sustainability.

Regardless of which method you choose, remember that proper maintenance is essential. Regularly cleaning resin tanks, checking salt levels in ion-exchange units, and changing filters promptly in alternative systems can significantly enhance their performance and lifespan.

Dealing with Stubborn Deposits and Build-up

Dealing with stubborn deposits and limescale build-up can be extremely frustrating, but you can tackle these challenges head-on with the right expert advice and solutions.

Expert Advice and Solutions

Expert advice highlights the importance of understanding stubborn deposits and choosing the right cleaning products for effective surface restoration.

The type of deposit can vary greatly, from mineral build-up in your bathroom to grease in your kitchen. That’s why you must select a solution tailored to your specific challenge.

For instance, while acidic cleaners might be your best friend for tackling mineral accumulations, they could scratch more delicate surfaces. It is often recommended to start with milder solutions and only increase to stronger ones when necessary, striking a balance that protects your surfaces while still getting them squeaky clean.

Letting those products sit for a few extra minutes boosts their effectiveness against stubborn residues.